How to Teach a Kid to Ride Shoes With Wheels in 2026: The Complete Parent's Guide to Heelys, Heel Wheel Shoes & Roller Skate Shoes With Pop-Out Wheels
Teaching a kid to ride shoes with wheels is one of those parenting moments that feels bigger than it looks. Done right, it turns into a skill your child will enjoy for years. Done wrong, it ends in scraped knees, tears, and a pair of expensive roller shoes sitting unused in the closet. The good news is that with the right approach, almost any kid can learn to ride safely and confidently in just a few short practice sessions.
This complete 2026 parent's guide will walk you through everything you need: the three main types of shoes with wheels and how each one rides differently, what age is actually realistic for starting, step-by-step teaching techniques, the right safety gear, common beginner mistakes, and how to know when your child is ready to move up to a more advanced setup. Whether you are shopping for Heelys, Kick Speed heel wheel roller shoes, or roller skate shoes with pop-out wheels, this guide will help you teach with confidence.
Start browsing here: Heel Wheel Roller Shoes, Roller Skate Shoes with Pop-Out Wheels, LED Roller Shoes, Size Guide.

Quick Answer: How Do You Teach a Kid to Ride Shoes With Wheels?
Teaching a kid to ride shoes with wheels starts with choosing the right type of shoe for their age and balance level, making sure they wear full protective gear, and practicing on a flat smooth surface in short controlled sessions. Beginners usually do best with heel wheel roller shoes that allow simple sliding movement without needing skating skills, while older or more confident kids can move up to roller skate shoes with pop-out wheels for a more skate-like ride.
The key to success is breaking the learning process into small wins: walking in the shoes first, balancing while standing, short one-second glides, controlled stops, then longer rides. Most kids can ride comfortably within three to five practice sessions when parents follow a progressive step-by-step method.
Understanding the 3 Types of Shoes With Wheels (Before You Teach Anything)
Before you can teach your child, you need to know what you actually bought. This is where most parents get confused, because all three types get grouped together online as "shoes with wheels for kids" even though they ride completely differently and require different teaching techniques. Here is the clean breakdown.
Type 1: Classic Heelys (Single Heel Wheel Only)
Heelys are the original heel-wheel shoe brand that most parents recognize. They have one single wheel built into the heel of each shoe. To ride, the child shifts their weight onto their heels and lifts the toes, then glides forward on the back wheels. When they want to walk, they simply place the foot flat again.
This style rewards balance and coordination. Kids who already have good body awareness often pick it up quickly, but the single heel wheel can feel tippy and unstable for first-time riders or younger children. There is no option to add extra wheels for more stability.
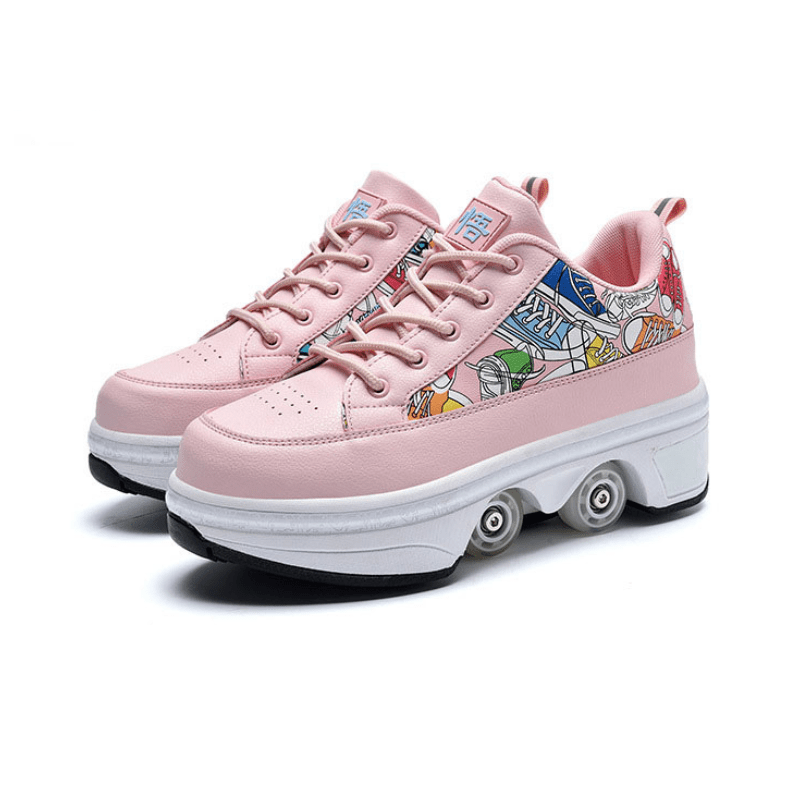
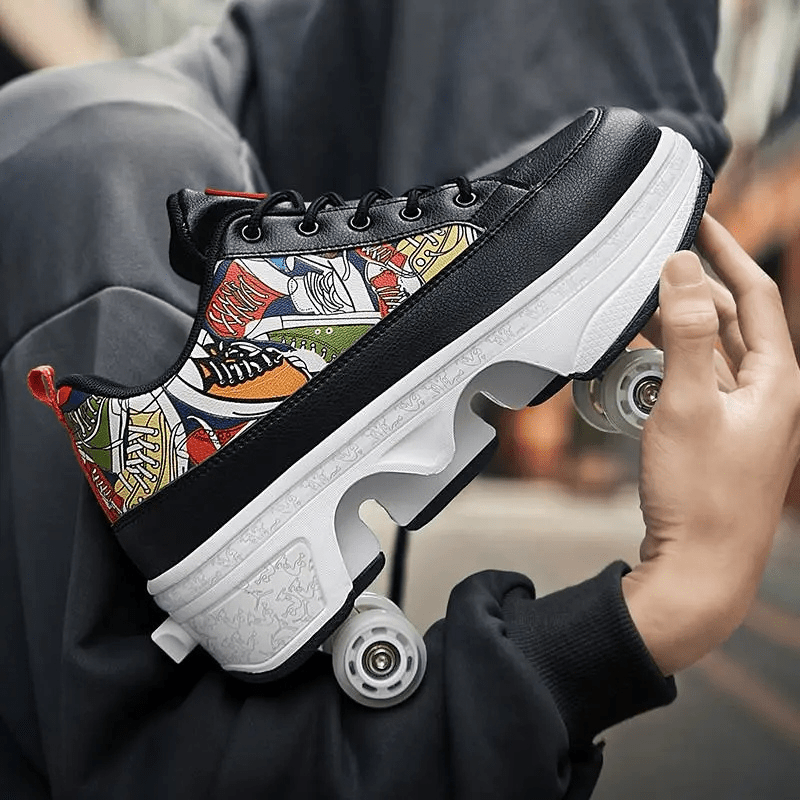
Type 2: Heel Wheel Roller Shoes (Kick Speed Style with Optional Front Wheel)
Kick Speed heel wheel roller shoes look similar to Heelys at first glance, but they give parents something Heelys do not: flexibility. The shoe has a heel wheel for the classic rear-wheel glide, but on selected models you can also add a front wheel. That one small difference changes the whole experience.
With just the heel wheel, the shoe rides like a regular heel-wheel setup for kids who want the traditional slide-and-glide feel. Add the front wheel and it becomes a much more stable two-point ride, which makes it dramatically easier for small kids or cautious beginners to feel balanced. This is why heel wheel roller shoes are often the best starting point for younger children who cannot skate yet and just want to slide around and have fun.

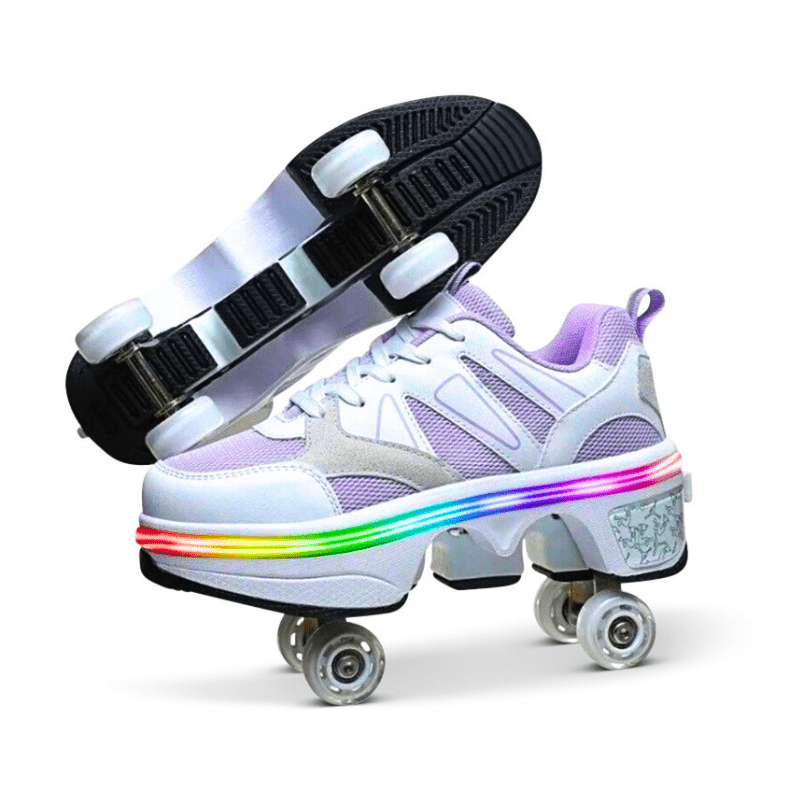
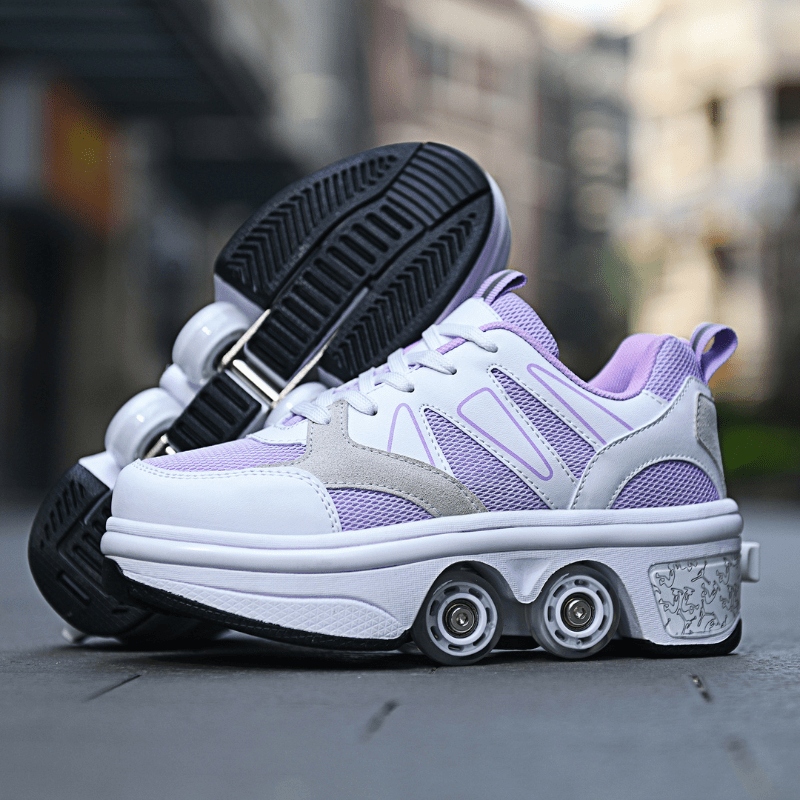
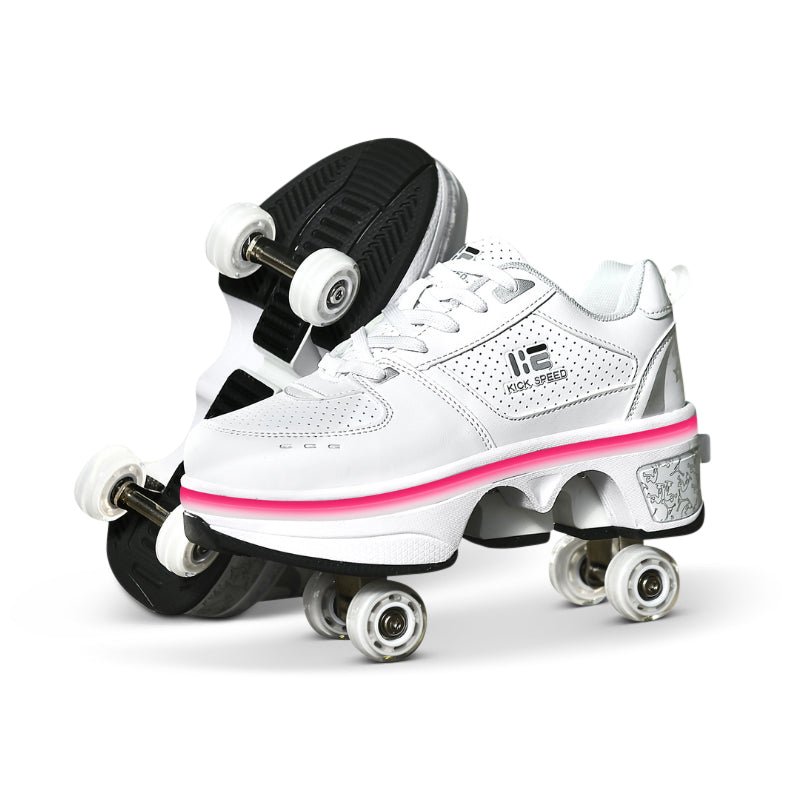
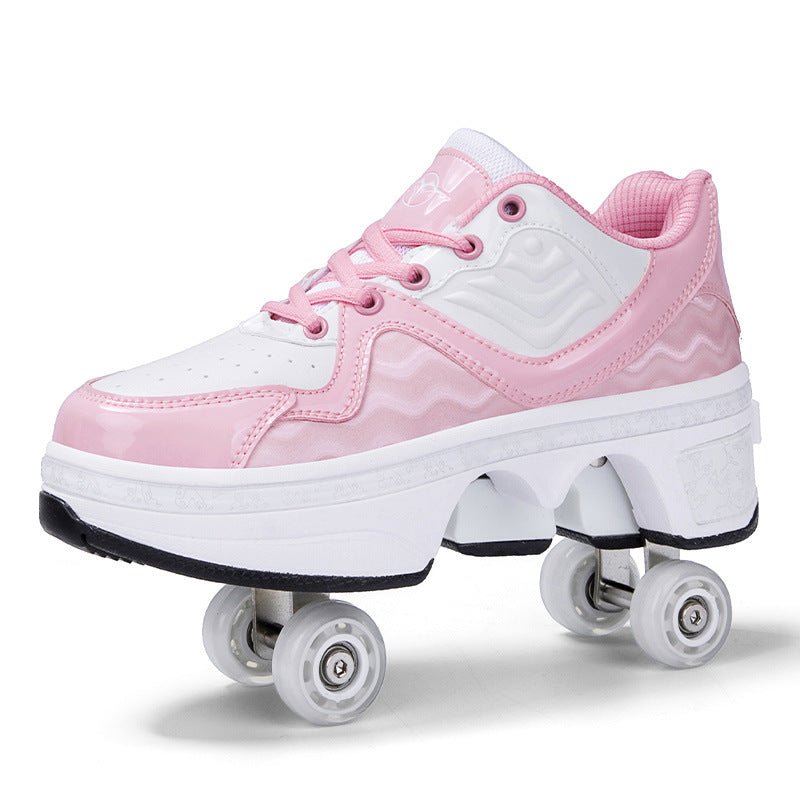
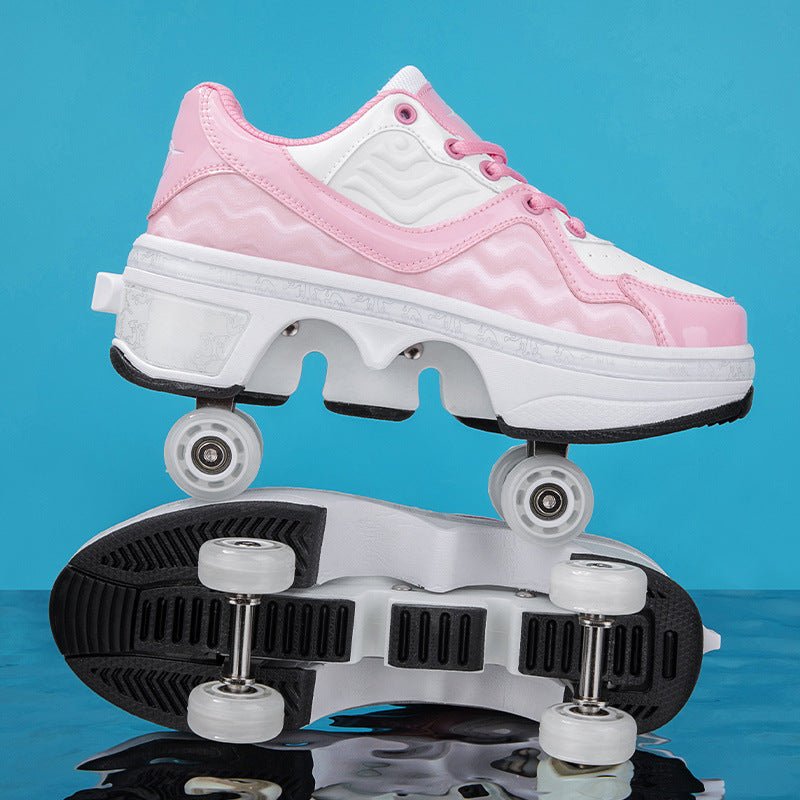
Type 3: Roller Skate Shoes With Pop-Out Wheels (Button-Activated Retractable)
Roller skate shoes with pop-out wheels are a completely different category. These are essentially hybrid sneakers with a full set of retractable wheels built into the sole. The child presses a button on the heel and the wheels pop out, turning the shoe into a mini roller skate. Press again and the wheels retract back into the sole so they can walk normally.
Because the shoe rides on multiple wheels, the stance is much more stable than a heel-wheel setup. It also feels closer to actual roller skating, which means the rider needs to use skating technique: pushing off, striding, turning, and controlled stopping. This makes pop-out wheel shoes ideal for slightly older or more confident children who want a real skating experience, not just a slide.
In short: heel wheel shoes are for sliding and having fun, while roller skate shoes with pop-out wheels are for actual skating. Understanding this difference is the single most important thing to get right before teaching your child.
At What Age Can Kids Actually Start Riding Shoes With Wheels?
Age matters more than most parents realize, because it affects balance, strength, coordination, and most importantly the size of shoe your child can actually wear. Not every child is ready at the same age, but here is a realistic framework based on real foot sizes, learning ability, and the way each shoe type rides.
Under Age 6: Not Recommended Yet
Children under six usually do not have the balance, coordination, or leg strength needed to safely enjoy shoes with wheels. Their feet are also smaller than most roller shoe sizes start at. We recommend waiting until your child is at least six years old, has shown good balance in regular sneakers, and can follow safety instructions clearly.
Ages 6 to 7: The Beginner Zone (Start With Heel Wheel Shoes)
This is usually the earliest age range where shoes with wheels make sense. Kids this age are growing out of the "just learning to run" stage and starting to show better coordination. Their feet are typically large enough to fit the smallest Kick Speed heel wheel roller shoe models.
The Kick Speed Photon Glow LOW Heel Wheel Roller Shoes with LED start at around 17.6 cm (about 6.9 inches) inner length, which generally fits children in this younger age range. Because size charts can vary between brands and between a child's left and right foot, always measure the actual foot length and check the official Kick Speed Size Guide before ordering.
At this stage, the goal is not real skating. It is controlled sliding and having fun. Heel wheel roller shoes with an added front wheel are the best starting point because they feel stable and forgiving.
Ages 8 to 10: The Sweet Spot for Learning
This is the age range where most kids truly thrive on shoes with wheels. Balance and coordination are well developed, the feet are large enough for a wider range of styles, and confidence is usually high. Kids in this range can ride heel wheel shoes comfortably and many are ready to try roller skate shoes with pop-out wheels.
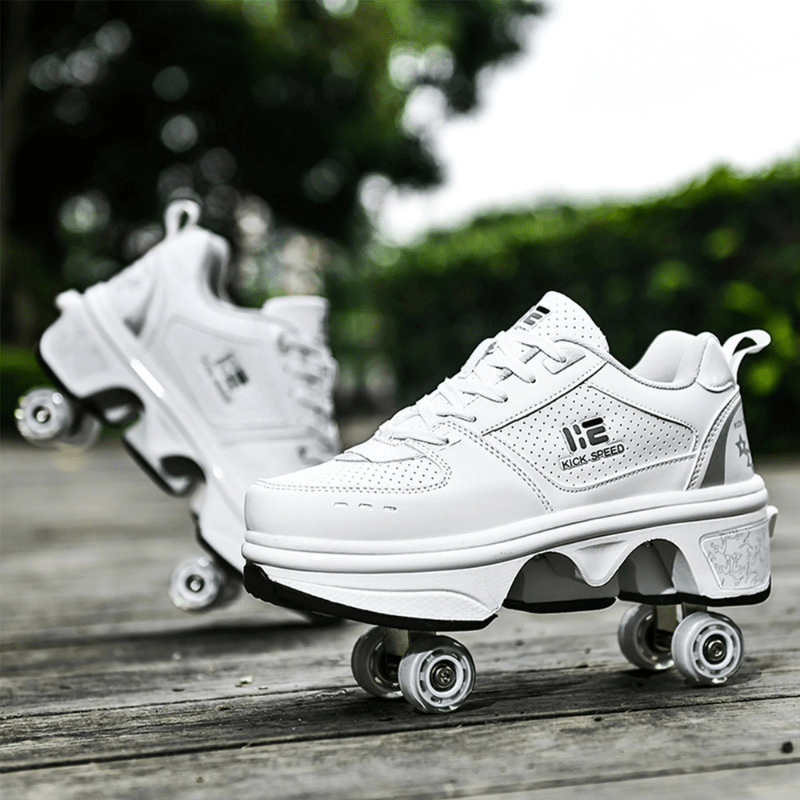
The smallest Kick Speed Original LOW White Roller Skate Shoes start at around 20.7 cm (about 8.1 inches) inner length, which often fits kids in this age range. Most pop-out wheel models at Kick Speed cover the range from roughly 22 to 28 cm (about 8.7 to 11 inches), matching the growth years perfectly.
Ages 11 to 12: The Style and Confidence Years
Older kids care about style and performance. At this age, most riders have full control over basic skating movements and are ready for LED models, bolder designs, and longer rides. Many kids in this range can switch between heel-only heel wheel riding and pop-out wheel skating depending on the situation.
This is also the age where LED roller shoes often become a favorite because they look cool, show off at school, and add visibility during evening rides.
Teens 13 and Up: Full Range Available
Teenagers can use any style in the range, and many start experimenting with tricks, faster glides, and classic Heelys-style riding. At this age, style and self-expression matter as much as performance, so the choice often comes down to whichever model the teen thinks looks best.

Before the First Ride: What Every Parent Should Prepare
The quality of your child's first few rides will shape whether they love shoes with wheels or give up on them. Preparation matters as much as technique. Here is what to get right before you even think about teaching.
Getting the Right Fit
A loose shoe is a wobbly shoe. A tight shoe is a painful shoe. Either one will ruin the learning experience. Before ordering, measure your child's foot by having them stand flat against a wall with a piece of paper on the floor. Mark the tip of the longest toe and measure from the wall to that mark in both centimeters and inches. Compare this measurement to the official Kick Speed Size Guide rather than guessing from another sneaker brand. Size charts can vary, and the correct internal length matters much more than the size number.
Essential Protective Gear
No parent should teach a child to ride shoes with wheels without proper safety gear. This is the single most important part of the whole process, and it should not be optional. At minimum, your child needs a helmet and wrist guards. Knee pads and elbow pads are strongly recommended as well, especially during the first few weeks.
- Helmet: Properly fitted, sitting level on the head with the strap snug under the chin.
- Wrist guards: The most commonly broken bone in kids roller sports is the wrist. Do not skip these.
- Knee pads: Reduce the pain of falls and help kids stay willing to practice.
- Elbow pads: Extra protection for side falls, especially on concrete.
Choosing the Right Practice Surface
Where you teach is as important as how you teach. For the very first sessions, look for a surface that is flat, smooth, clean, and uncrowded. Good options include an empty driveway, a quiet sidewalk, a school playground after hours, an empty basketball or tennis court, or a smooth section of a local park path. Avoid rough pavement, cracks, gravel, wet surfaces, slopes, and anywhere with cars or crowds.
The Right Clothing
Have your child wear long pants and long sleeves for the first several practice sessions. Falls feel much less painful when there is fabric between skin and pavement. Shorts and t-shirts can come later once confidence is built.
How to Teach a Kid to Ride Heel Wheel Roller Shoes (The Beginner's Path)
If your child is new to shoes with wheels, this is almost certainly where you should start. Heel wheel shoes are the most beginner-friendly because they do not require real skating technique. Your child just needs to learn how to shift their weight and glide. Here is the progression that works for most kids.
Step 1: Walk in the Shoes First
Before rolling, let your child walk around in the shoes on carpet or grass. This helps them get used to the feel and weight of the shoe, and they will instinctively learn how to avoid rolling on the heel by accident. Spend the first ten minutes just walking normally.
Step 2: Stand and Balance
Move to a smooth flat surface. Have your child stand still with knees slightly bent and arms out for balance. Ask them to gently rock forward onto the toes and back onto the heels to feel the difference. This is the exact movement that activates the wheel, so they need to feel where that tipping point is.
Step 3: The Assisted First Glide
Stand in front of your child and hold both their hands. Have them start walking toward you, then on the third or fourth step, lift the toes and let the heels roll for a brief one-second glide. Catch them if they lean back too far. The key instruction is: "lean slightly forward, not backward." Leaning back is the number one beginner mistake.
Step 4: Short Solo Glides
Once they feel the motion, let them try short glides on their own. The target is a one-to-two-second roll, then stepping back down to walking. Praise every successful glide. Do not rush them toward longer rides.
Step 5: Controlled Stops
The easiest stopping method for beginners is the step-down stop. As the glide slows, the child simply places their foot flat and walks out of the roll. Practice this repeatedly until it feels automatic. Never tell a child to just "stop suddenly," because that usually causes falls.
Step 6: Longer Glides and Gentle Turns
Once one-second glides feel comfortable, extend to three seconds, then five. Introduce very wide gentle turns by shifting weight slightly to one side. Sharp turns should wait until much more experience is built.
Tip: Start With the Front Wheel Attached
If you chose a Kick Speed heel wheel roller shoe that supports a front wheel, attach it for the first several sessions. The extra point of contact makes balance dramatically easier and gives your child the confidence to keep trying. You can remove the front wheel later once they are comfortable on the heel wheel alone.
How to Teach a Kid to Ride Roller Skate Shoes With Pop-Out Wheels
Pop-out wheel shoes ride like actual roller skates. If your child already has some skating experience or is comfortable with heel wheel shoes, this is the natural next step. The technique is different, so do not assume it will be automatic.
Step 1: Practice the Button Mechanism First
Before any riding, have your child practice deploying and retracting the wheels several times while sitting down. They need to feel confident pressing the heel button and hearing the wheels lock into place. Make sure the wheels are fully deployed and secured before they stand up.
Step 2: Stand With Support
Deploy the wheels and let your child stand holding a wall, fence, or your hand. The stance is different from normal shoes because the feet roll easily. Have them get used to the sensation of standing still on wheels.
Step 3: Walk Like a Duck
The first forward movement on pop-out wheel shoes is the duck walk. Have your child point their toes outward in a V shape and take small stepping movements forward. This prevents the wheels from rolling backward and builds the basic pushing-off motion that real skating uses.
Step 4: The First Push and Glide
From the duck walk, teach them to push gently with one foot while the other foot rolls forward. Keep knees bent, body leaning slightly forward, and arms relaxed for balance. The first push-glide should be very short. Repeat many times before extending.
Step 5: Alternating Push and Glide
Once single pushes feel stable, teach alternating pushes: push with the left foot while gliding on the right, then switch. This is real skating motion and it takes practice. Expect wobbles and be patient.
Step 6: Stopping on Pop-Out Wheels
Stopping on pop-out wheel shoes is harder than on heel wheel shoes because both feet are rolling. The safest beginner method is the controlled slowdown: gradually reduce pushing power, let the shoes roll to a near stop, then step off the wheels or retract them if possible. Teach this on flat ground without any slope.
Step 7: Turning
Wide sweeping turns come first. Have your child lean their body gently in the direction they want to turn while keeping the knees bent. Avoid sharp turns entirely until after several successful practice sessions.
How to Teach a Kid to Ride Classic Heelys (Single Heel Wheel)
Classic Heelys use the same basic technique as heel wheel roller shoes, but without the option to add a front wheel. This means the learning curve is steeper. If your child is new to shoes with wheels, we strongly recommend starting with Kick Speed heel wheel roller shoes with the front wheel attached, then progressing to Heelys-style single-heel riding once balance is strong.
If you are teaching classic Heelys directly, follow the same step-by-step process as heel wheel roller shoes, but expect more wobble and longer learning times. Extra focus should go into balance drills before any rolling: standing on one foot, walking in a straight line, and shifting weight smoothly.
Common Beginner Mistakes and How to Fix Them
Almost every kid makes the same mistakes when learning shoes with wheels. Recognizing them early lets you correct them before they turn into bad habits or painful falls.
Mistake 1: Leaning Too Far Back
When the wheel rolls, kids instinctively lean backward to "catch" themselves, which actually makes them fall backward. The fix is constant reminders to lean slightly forward from the hips with knees bent. This is the single most important correction for all three types of shoes with wheels.
Mistake 2: Looking Down at the Feet
Kids want to watch what their feet are doing. Unfortunately, looking down throws off balance and reduces awareness of obstacles. Teach them to look forward in the direction they are going, just like riding a bike.
Mistake 3: Trying to Go Too Fast Too Soon
Speed is addictive, and once a child feels their first successful glide they will want to push harder. Slow this down deliberately. Short glides mastered perfectly are worth more than long glides attempted recklessly.
Mistake 4: Stiff Legs
Straight, locked knees turn every bump into a balance disaster. Keep reminding your child to bend their knees. A slightly crouched athletic stance absorbs surface changes and keeps the center of gravity low and stable.
Mistake 5: Skipping Wrist Guards
Kids fall forward. When they do, they catch themselves with their hands. Without wrist guards, this is how wrists get broken. Wrist guards are not negotiable for beginners, no matter how much your child argues.
Mistake 6: Practicing on Bad Surfaces
Gravel, cracks, wet pavement, slight slopes, and leaves all make learning much harder than it needs to be. If your child is struggling, check the surface before you assume it is a technique problem.
Mistake 7: Practicing Too Long in One Session
Learning shoes with wheels is physically tiring, especially for younger kids. Tired legs equal wobbly rides and preventable falls. Keep early sessions to fifteen or twenty minutes maximum, then take a break.
A Realistic Week-by-Week Progression Plan
Most kids do not learn shoes with wheels in a single afternoon, and pushing them to master everything at once leads to frustration. Here is a realistic timeline that works for most beginners.
Week 1: Confidence and Balance
Short sessions of fifteen minutes, two or three times across the week. Focus on walking in the shoes, standing balance, and very short assisted glides with you holding their hands. No solo riding yet.
Week 2: Short Solo Glides
Extend sessions to twenty minutes. Work on one-to-two-second solo glides, the step-down stop, and very gentle turns. Expect falls. Praise effort more than results.
Week 3: Connecting Glides
Longer sessions up to thirty minutes. Focus on linking multiple glides together, consistent stopping, and slightly wider turns. Most kids start to feel comfortable around this point.
Week 4 and Beyond: Independence
By now your child should feel confident on flat open surfaces. This is when you can start introducing longer rides, slightly varied terrain, and if using heel wheel shoes with an adjustable front wheel, experimenting with removing it for a more advanced single-wheel feel.
When Is Your Child Ready to Upgrade?
Many families start with one type of shoe and later upgrade as skills grow. Here are the signals that tell you it is time to move up.
Ready to Remove the Front Wheel
If your child is riding heel wheel shoes with the front wheel attached and can glide for five or more seconds consistently, stop smoothly, and turn with control, they are probably ready to try heel-only riding. Start on a familiar flat surface and expect a short adjustment period.
Ready to Move From Heel Wheel to Pop-Out Roller Skate Shoes
If your child is comfortable on heel wheel shoes without the front wheel, rides for long periods without wobbling, and is asking for "more skating" rather than sliding, they are ready for roller skate shoes with pop-out wheels. Treat this as learning a new skill, because the technique is different.
Ready for Classic Heelys-Style Single Wheel
Once a rider can glide, stop, and turn confidently on heel wheel shoes without the front wheel, they can handle single-wheel classic Heelys-style riding on any shoe. The difference at that point is mostly style preference, not skill.

Comparison: Which Shoe Type Should You Teach Your Kid On?
If you are still deciding which shoe to start with, this comparison table makes the decision easier.
| Feature | Classic Heelys (Heel Wheel Only) | Kick Speed Heel Wheel Roller Shoes | Roller Skate Shoes With Pop-Out Wheels |
|---|---|---|---|
| Ride style | Single heel wheel sliding | Heel wheel sliding with optional front wheel | Full skating on multiple retractable wheels |
| Learning difficulty | Moderate to hard for beginners | Easy with front wheel, moderate without | Moderate, requires skating technique |
| Best age range | Kids with existing balance skills | Younger beginners and cautious riders | Older kids ready for real skating |
| Smallest size available | Varies by model | Around 17.6 cm / 6.9 inches | Around 20.7 cm / 8.1 inches |
| Walking comfort | Good | Good | Excellent when wheels retracted |
| Skating skill required | Some balance needed | Minimal with front wheel | Yes, teaches real skating |
Safety Rules Every Parent Should Set From Day One
Establishing rules early prevents arguments later. Kids respect clear boundaries when they understand the reason, and these rules come directly from the most common injury patterns for shoes with wheels.
- No shoes with wheels without full safety gear. No exceptions, even for quick rides.
- No riding on hills, slopes, or declines. Until your child can demonstrate consistent controlled stopping on flat ground.
- No riding near traffic or in parking lots. Cars and kids on wheels do not mix.
- No riding on wet surfaces. Water dramatically reduces wheel grip.
- No riding in crowded areas. Sudden stops in crowds cause the most falls.
- No tricks until basics are mastered. Jumps, spins, and stunts come later, not in the first month.
- Retract or remove wheels before going indoors. Especially at school, where wheels often violate dress codes and can damage flooring.
What to Do When Your Child Wants to Give Up
Almost every kid hits a frustration point, usually after their first real fall. How you handle this moment determines whether they push through or abandon the shoes entirely. Here are the approaches that work.
First, validate the frustration. Do not dismiss it with "you are fine, keep going." Acknowledge that it is hard and that falling hurts. Second, shorten the session. A child who is frustrated after fifteen minutes needs to stop, not push through for thirty. Third, return to an easier skill. If they are failing at glides, go back to standing balance. Small wins rebuild confidence fast. Fourth, take a day off. Sometimes the best thing a parent can do is put the shoes away for twenty-four hours and come back refreshed.
Finally, consider whether the shoe type is right for them. A child struggling with classic single-heel Heelys might thrive instantly on Kick Speed heel wheel roller shoes with a front wheel attached. Sometimes the problem is not the kid. It is the equipment.
Indoor vs Outdoor Learning: Where to Practice
Most parents think shoes with wheels are outdoor-only, but indoor practice has real advantages for beginners. Indoor surfaces are usually smoother, there is no weather to worry about, and the controlled environment reduces distractions.
Best Indoor Locations
School gyms, indoor roller rinks, large hallways at home with clear space, and some community centers allow shoes with wheels during off-hours. Always check rules first and make sure the floor surface is appropriate.
Best Outdoor Locations
Empty basketball and tennis courts are the gold standard. Flat smooth sidewalks in quiet neighborhoods, school playgrounds after hours, and flat park paths also work well. Avoid skate parks until your child is advanced because those are designed for experienced skaters.
When LED Roller Shoes Help the Learning Process
LED roller shoes are more than just fun. For many kids, the lights provide real motivation to practice. A child who is excited to show off their light-up shoes will practice more often and more willingly than a child wearing plain sneakers. More practice equals faster skill development.
LEDs also add visibility during evening rides, which is a genuine safety benefit during shorter winter days or after-school practice. And for kids who are nervous about falling, the excitement of wearing something that looks cool often helps them push past that fear.
Shop Shoes With Wheels for Kids by Stage
Use this quick shopping guide to match the right shoe type to your child's current stage.
- Brand new beginner, ages 6 to 7: Start with Kick Speed heel wheel roller shoes with the front wheel attached. The Photon Glow LOW is a strong starting point.
- Confident beginner, ages 8 to 10: Try heel wheel roller shoes without the front wheel, or step up to roller skate shoes with pop-out wheels.
- Style-focused rider, ages 11 to 12: Pick an LED roller shoe in either heel wheel or pop-out style, depending on preference.
- Teen and advanced rider: Any style works. Choose based on design preference and the ride feel they want.
Frequently Asked Questions
What is the easiest type of shoes with wheels for a beginner kid?
Kick Speed heel wheel roller shoes with the front wheel attached are generally the easiest starting point for beginners. The extra wheel provides much more stability than single heel wheel shoes, which makes balance and gliding feel more natural for younger or cautious riders.
What is the difference between heel wheel shoes and roller skate shoes with pop-out wheels?
Heel wheel shoes have a permanent wheel in the heel and you ride by sliding forward on that wheel. Roller skate shoes with pop-out wheels have a full set of retractable wheels that pop out with a heel button, turning the shoe into a mini roller skate for real skating movement. Heel wheel shoes are for sliding fun, while pop-out wheel shoes are for actual skating.
Are Kick Speed heel wheel shoes the same as Heelys?
They are similar in that both use a heel wheel for the classic glide style, but Kick Speed heel wheel roller shoes allow a front wheel to be added on selected models. That front wheel option makes them more stable and easier for beginners compared to single-heel-wheel Heelys.
At what age should a kid start using shoes with wheels?
Most kids are ready around age six or seven at the earliest, because that is when balance, coordination, and foot size all come together well. Children under six usually lack the balance needed for safe riding and often do not have feet large enough to fit the smallest roller shoe sizes.
How long does it take to learn to ride shoes with wheels?
Most kids can perform short controlled glides within one or two practice sessions and feel genuinely comfortable within three to four weeks of regular practice. Heel wheel shoes with a front wheel attached have the shortest learning curve, while classic single-heel Heelys and pop-out wheel skating take longer.
Do kids really need wrist guards for shoes with wheels?
Yes. The wrist is the most commonly injured bone in kids roller sports because children instinctively catch themselves with their hands during forward falls. Wrist guards are the single most important piece of protective equipment for beginners, alongside a helmet.
What is the best surface for teaching a kid to ride shoes with wheels?
An empty basketball or tennis court is ideal because the surface is smooth, flat, and predictable. Quiet sidewalks, flat driveways, and school playgrounds after hours also work well. Avoid gravel, cracks, wet surfaces, slopes, and any area with traffic.
How do I pick the right size shoes with wheels for my child?
Measure your child's foot length in centimeters and inches, then compare the measurement to the official Kick Speed Size Guide. Size charts can vary between brands, so do not guess based on another sneaker size. A snug, secure fit is critical for balance and control.
Can shoes with wheels be worn to school?
It depends on the school's rules. Many schools allow roller skate shoes with pop-out wheels or heel wheel shoes as long as the wheels stay retracted or unused during school hours. Always check with the school first, and make sure your child knows not to roll in hallways even if the shoes are allowed.
My child is scared after falling. What should I do?
Validate their feelings, shorten the session, and go back to an easier skill where they can have some quick wins. Sometimes a short break of a day or two helps a lot. If the problem keeps happening, consider whether the shoe type is too advanced for their current skill level, and if needed, switch to heel wheel shoes with a front wheel attached for a gentler learning experience.
Final Thoughts: Patience Beats Everything
Teaching a kid to ride shoes with wheels is not about pushing them to be fast or impressive. It is about giving them a positive learning experience that builds confidence, coordination, and a skill they will enjoy for years. The parents who succeed are not the most athletic or the most experienced. They are the ones who break the learning process into small steps, celebrate every small win, insist on safety gear, and know when to take a break.
Choose the right shoe type for your child's age and confidence level. Start on smooth flat ground with full protective gear. Follow the step-by-step progression. Be patient when things get frustrating. And remember that almost every kid who sticks with it ends up loving the experience.
Ready to start? Browse beginner-friendly heel wheel roller shoes, explore roller skate shoes with pop-out wheels, check LED roller shoes, and review the official size guide before ordering.